
Want to get emailed every week over what RO's have been deleted (if any)?
How about emails daily on how many RO's had a labor margin of less than 10%?
Or a monthly email letting you know about how many ROs have been open for 50+ days?
You can create email alerts over report criteria YOU set!
Create a New Email Alert
- 1. Go to Custom Reports
In the sidebar, open the Custom Reports section and select Email Alerts at the bottom.
.jpg?width=670&height=352&name=Untitled%20drawing%20(3).jpg)
.jpg?width=670&height=352&name=Untitled%20drawing%20(4).jpg)
- 2. Name and Describe Your Email Alert
- Email Alert Name: Give your Email Alert a clear, descriptive name.
Example: “Parts Potentially Not Charged” - Description: Add a short explanation of what this Email Alert monitors.
- Shared (optional): Toggle this on to allow others on your team to view and access the tracker.
- Email Alert Name: Give your Email Alert a clear, descriptive name.
.jpg?width=670&height=352&name=Untitled%20drawing%20(6).jpg)
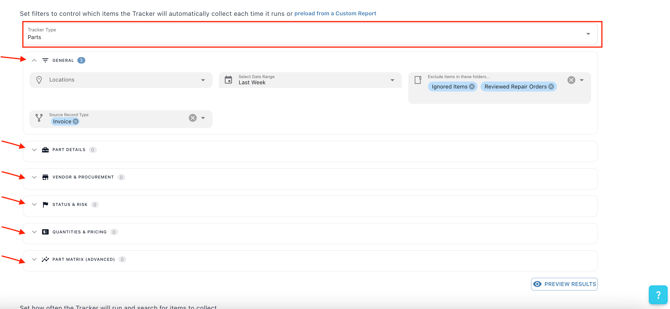
- 3. Set Filters
Choose which items the Email Alert should automatically collect.
- Use the Email Alert Type dropdown to pick the kind of data you want to monitor.
- You can also preload from a Custom Report if you’ve already defined your filters elsewhere or want to use one of WickedFile's canned reports!
- Use the Email Alert Type dropdown to pick the kind of data you want to monitor.
- 4. Choose Frequency
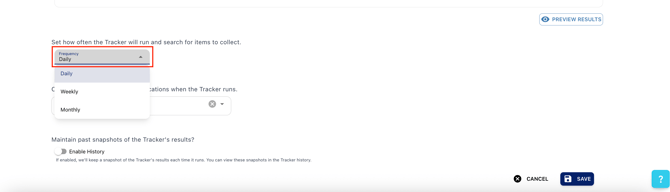
Set how often the Email Alert runs to search for new items.
- Pick from available options (e.g., daily, weekly, monthly).
- The Email Alert runs automatically around 12:00 AM GMT on the selected day.
- Pick from available options (e.g., daily, weekly, monthly).
- 5. Select Notification Recipients
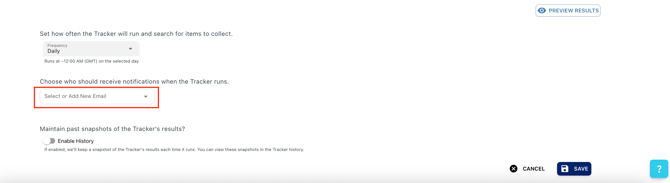
Choose who should receive an email notification each time the report runs.
- Use the dropdown to select or add new email addresses.
- Use the dropdown to select or add new email addresses.
- 6. Enable History (optional)
Turn on Enable History if you want to maintain past snapshots of your Email Alerts results.
- WickedFile will keep a record of each run so you can review changes over time in the Email Alert History view.
- WickedFile will keep a record of each run so you can review changes over time in the Email Alert History view.
- 7. Save Your Email Alert
Click Save to create your Email Alert.
Your tracker will now run automatically according to the schedule and filters you defined.
📊 Viewing Email Alert Results
Once created, Email Alerts appear in your custom report list.
Each time they run:
- The results automatically update with new matching items.
- If history is enabled, you’ll see timestamped versions for trend comparison.
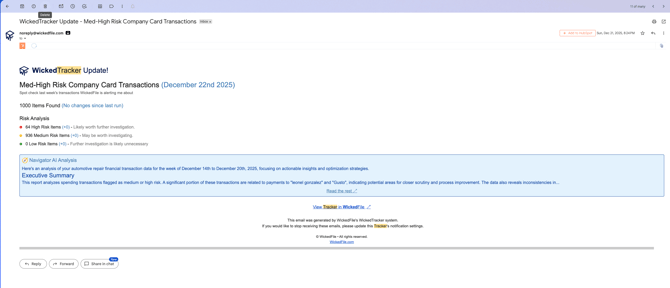
- Recipients receive emails summarizing what’s new or changed:
💡 Tips
- Combine filters to narrow results precisely to what matters most.
- Use historical snapshots to visualize long-term patterns.
- Share trackers across your team to align insights automatically.